
Building a Utility Weather Widget with JavaScript
Building a Utility Weather Widget


We've all seen widgets on web pages before, haven't we? Those little icons of varying shapes and sizes usually displayed in a corner of a device’s viewport. These widgets are simply small, pre-designed components that can be easily added to a website to provide additional functionality or information. They can be made using HTML, CSS, and JavaScript. By hovering over or clicking on a widget, you can interact with it and see what it does. Examples of widgets include chatbots in the sidebar, pop-ups, and CTA buttons.
In this article, we will learn how to build a widget that displays a user's current weather, date and time using their current location.
Why use Widgets?
For one, you can use widgets to improve the visual organization and presentation of information on a website. Widgets can be added to a website to provide additional features or hide data that may create cluttered visual elements. They can also be used to display pop-ups and other types of information without making changes to the website's underlying code. By using widgets, you can effectively reduce clutter and improve the overall appearance of your website.
Prerequisites
Fundamental knowledge of HTML, CSS and JavaScript.
Fundamental knowledge of JavaScript’s Native Internalization and Geolocation API.
Fundamental knowledge of Asynchronous JavaScript (Using Promises and the try… catch block).
A code editor and a browser (Preferably Google Chrome).
Fundamental knowledge of the working of a Browser’s Dev Tools.
Project Breakdown
Before we dive into building our project, it is important to know that this project consists of 2 parts:
The Interface section
The Functionality section
The Interface Section
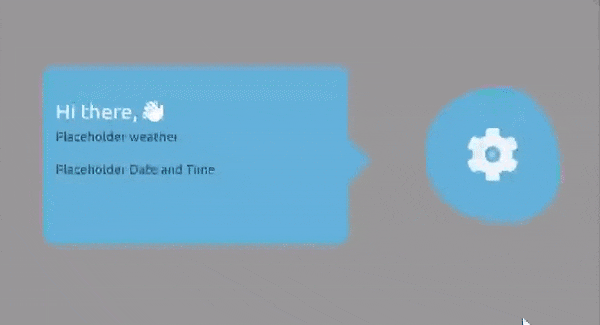
This section consists of all the mockup and styling required to render our widget on the page. Instead of diving head-first into the strange-looking HTML and CSS, I will give you a sneak preview of what the widget will look like in the end. This will help you understand why our codebase is structured the way it is.
Excited right? Let’s dive in!
The markup for this project is shown below.
<body>
    <div class="widget">
      <div class="widget__blob">
         <i class="fa-duotone fa-gear"></i>
      </div>
      <div class="widget__sidebar">
        <div class="arrow__pointer"></div>
        <div class="weather">
          <span class="greet">Hi there, </span>
          <i class="fa-solid fa-hand-wave"></i><br />
        </div>
        <div class="date">Placeholder Date</div>
        <div class="color__palette--container">
          <div class="color__palette" data-bgcolor="#5DADE2"></div>
          <div class="color__palette" data-bgcolor="#cf9fed"></div>
          <div class="color__palette" data-bgcolor="#73C6B6"></div>
          <div class="color__palette" data-bgcolor="#EDBB99"></div>
          <div class="color__palette" data-bgcolor="#808B96"></div>
        </div>
      </div>
    </div>
I know the HTML markup looks weird with all the nesting and data attributes😂, so let’s go over it. First, the main parent element is a div with the class “widget” containing 2 child elements, ( widget__blob ) and ( widget__sidebar ). The widget__blob contains only one element, which is an icon from font awesome.
Next, the widget__sidebar contains 4 elements ( arrow__pointer, weather, date and color__palette–container ), which are all self-explanatory. The only thing left to highlight is the data-bgcolor attribute attached to each of the color-pallette elements. This attribute will help us dynamically set each of the element’s background to the value set in its data-bgcolor attribute. With the HTML set, we can now proceed to the CSS part of this section.
The Styling for this project is shown below.
* {
  margin: 0;
  padding: 0;
  box-sizing: border-box;
  font-family: "Ubuntu", sans-serif;
}

body {
  display: flex;
  justify-content: center;
  align-items: center;
  height: 100vh;
  background: #e0e0e0;
}

.widget {
  position: relative;
  width: 220px;
  height: 220px;
  display: flex;
  justify-content: center;
  align-items: center;
}

.widget__blob {
  width: 75%;
  height: 75%;
  cursor: pointer;
  background: #5dade2;
  border-radius: 68% 55% 46% 69% / 58% 74% 44% 59%;
  z-index: 2;
  display: flex;
  justify-content: center;
  align-items: center;
  font-size: 4rem;
  color: #f0f4fd;
  transition: all ease-in 0.2s;
}

.widget__blob:hover > i {
  animation: blobby 10s infinite linear;
}

@keyframes blobby {
  0% {
    transform: rotate(0);
  }
  100% {
    transform: rotate(360deg);
  }
}

.widget__sidebar {
  color: #3d3d3d;
  position: absolute;
  top: 0;
  width: 170%;
  left: -200%;
  height: 100%;
  display: flex;
  flex-direction: column;
  justify-content: center;
  padding: 1rem;
  gap: 1rem;
  line-height: 1.5;
  transition: all ease-in 0.2s;
  background: #5dade2;
  border-radius: 1rem;
}

.arrow__pointer {
  position: absolute;
  content: "";
  top: 50%;
  transform: rotate(45deg) translate(0, -50%);
  right: 0;
  background: #5dade2;
  width: 50px;
  height: 50px;
  transition: all ease-in 0.2s;
  z-index: -1;
}

.weather span {
  color: #fff;
  font-size: 1.6rem;
}

.weather i {
  font-size: 1.6rem;
  color: #fff;
}

.color__palette--container {
  display: flex;
  gap: 0.5rem;
}

.color__palette {
  width: 25px;
  height: 25px;
  border-radius: 50%;
  cursor: pointer;
}
There's quite a lot of CSS code there, so feel free to take a moment to analyze it before moving on. The styling above simply arranges the two child elements of the widget element next to each other and adds some interactivity to the widget__blob element.
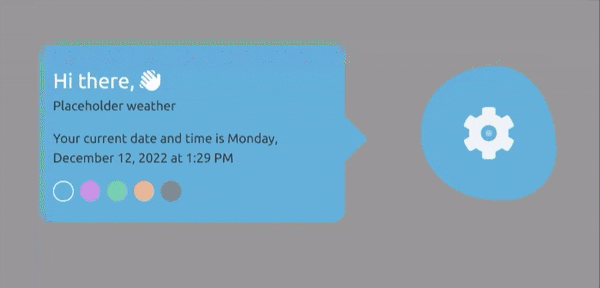
What we’ve achieved so far can be seen below
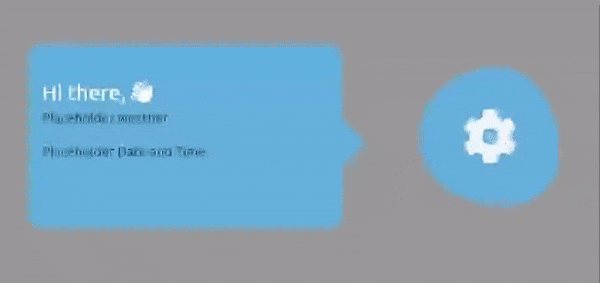
We neatly presented both elements and their contents, with only the elements in color__palette--container still yet to be displayed, but don’t worry, we would fix that in the Functionality section.
The Functionality Section
This section consists of all our program’s logic and how the widget would work. To help you grasp the totality of everything we’re going to do, here’s a flowchart of our application.
Flowchart of the Application

Before we begin implementing, we should keep in mind that we will start on the right side with the Load Page symbol.
We’ve already added the widget to the webpage. Now, we will handle the behaviour when the widget is clicked. We want to hide the widget__sidebar element and only show it again when the widget__blob is clicked. To achieve this, we will create a CSS class that hides the widget__sidebar element and add that class to the widget__sidebar element in our HTML markup.
.hidden {
  opacity: 0;
  transform: translateX(-100%);
}
Then target the widget__sidebar element to render the widget__sidebar visible with JavaScript whenever we click on the widget__blob.
const widgetBlob = document.querySelector(".widget__blob");
const widgetSideBar = document.querySelector(".widget__sidebar");

const revealSideBar = function () {                 widgetSideBar.classList.toggle("hidden");
};
widgetBlob.addEventListener("click", revealSideBar);
Here is a quick recap of how we just achieved this;
First, we selected both elements and stored them in variables.
Next, we created a function called revealSideBar which toggles the hidden class on the widget__sidebar element every time the widget__blob is clicked. Finally, we attached an event handler function to the widget__blob and passed the revealSideBar function as a callback. This means that the revealSideBar function will be called every time the widget__blob is clicked.
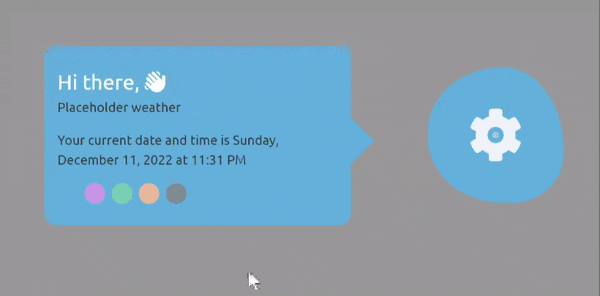
The next step in our flowchart is to display the color palettes and the current date and time. To do this, we use the following lines of code to dynamically set the color of each palette element to its corresponding HTML data attribute value (recall we stored color codes in their individual data attribute in our HTML markup).
const colorPalete = document.querySelectorAll(".color__palette");
colorPalete.forEach((el) => (el.style.backgroundColor = el.dataset.bgcolor));
This simply loops over each element and changes the background color to the value set in its data-bgcolor attribute.
Thus producing the interface below.

Next, we work on displaying live date and time information on the widget__sidebar. To accomplish this, we would make use of JavaScript’s Internationalization API. This API is a built-in feature of the JavaScript language that provides a set of functions and objects for formatting and parsing dates, numbers, and strings according to the conventions of a specific locale (ie the language format of the user’s location).
To begin, we first select our HTML element where we plan to store our date and time information.
const dateEl = document.querySelector(".date");
After that, we retrieve the language preference of the user from the browser using navigator.locale and store it in the locale variable.
const locale = navigator.language;
Logging my locale to the console, yields

Then we create a date using the date constructor function and store the result in the now variable.
const now = new Date();
Logging our result to the console gives:

Remember that the date and time information will vary based on when you implement this.
Next, we create a date options object which we would use to extract all the information we want from the date object.
const dateOptions = {
    hour: "numeric",
    minute: "numeric",
    day: "numeric",
    month: "long",
    year: "numeric",
    weekday: "long",
  };
Then, we use our Internationalization API to format our date to the user’s locale. To do this, we first create our Internationalization function and store it in a variable with the syntax below.
const curDate = new Intl.DateTimeFormat();
After that, we pass in our locale and our dateOptions object as arguments to our Internationalization function.
const curDate = new Intl.DateTimeFormat(locale, dateOptions);
Then, we call the format method on the date we’re trying to format.
const curDate = new Intl.DateTimeFormat(locale, dateOptions).format(now);
Looking at what we’ve done in the console gives;

Finally, we display our well-formatted data on our webpage.
dateEl.textContent = `Your current date and time is ${curDate}`;
With that, let’s have a look at our interface so far.

And yeah, we’ve successfully implemented live date and time information which is already pretty cool. Let’s refactor our new code into a nice helper function getDnT which contains all our date and time logic.
const getDnT = function () {
  const now = new Date();
  const dateOptions = {
    hour: "numeric",
    minute: "numeric",
    day: "numeric",
    month: "long",
    year: "numeric",
    weekday: "long",
  };
  const locale = navigator.language;
  const curDate = new Intl.DateTimeFormat(locale, dateOptions).format(now);
  dateEl.textContent = `Your current date and time is ${curDate}`;
};
Finally, we call the getDnT function with the same event handler function we called the revealSideBar function, like so
widgetBlob.addEventListener("click", function () {
  revealSideBar();
  getDnT();
});
Note: Instead of calling our function manually, we can attach it to an event handler function. This will prevent the function from constantly running in the background, which can improve performance.
To clarify the next step, we will change the theme of the widget_sidebar, arrow__pointer, and widget__blob based on the color palette that we click.
I’d like to divide this step into 3 sub-steps:
Theme Changing (Changing the theme based on the palette we click).
Active Class Addition (Adding an active class to the current palette we clicked on).
Local Storage Use ( Storing the active theme in local storage to prevent the theme from resetting on reload of the webpage).
Theme Changing
For this first step, we create a themeChanger function containing all the swapping logic between our target elements.
const arrowPointer = document.querySelector(".arrow__pointer");
const themeChanger = function (e) {
  widgetSideBar.style.backgroundColor = e.target.dataset.bgcolor;
  widgetBlob.style.backgroundColor = e.target.dataset.bgcolor;
  arrowPointer.style.backgroundColor = e.target.dataset.bgcolor;
};
The e argument is simply the event object which points to the current element being clicked. Then, we loop over each color__palette element, attach an event handler, and pass in the themeChanger function as an argument. This runs our themeChanger function everytime we click on a palette.
colorPalete.forEach((el) => {
  el.addEventListener("click", themeChanger);
});
We have successfully implemented the first step of our theme changer function.
Active Class Addition
If you paid attention, you may have noticed that whenever we click on a palette, it appears to blend in and disappear with the background. We plan to fix this by adding an active class to any element we click on, which will make it easier to see which element is currently selected. We first create a CSS active class which separates the active palette from the rest.
.color__palette--active {
  border: 1.5px solid #fff;
}
Then, we add that active class to any palette we click on using the code snippet below.
e.target.classList.add("color__palette--active");
Finally, to ensure that only the clicked palette has the active class, we need to remove the active class from all other palettes. This way, when a new palette is clicked, it will be the only one palette with an active class. This will help us achieve the desired behaviour where only one palette can be active at a time.
colorPalete.forEach((el) => el.classList.remove("color__palette--active"));
Note: We're adding the above code snippets to our themeChanger function so that we can add the active class when we toggle between themes.
This leaves our final function looking something like this:
const themeChanger = function (e) {
  widgetSideBar.style.backgroundColor = e.target.dataset.bgcolor;
  widgetBlob.style.backgroundColor = e.target.dataset.bgcolor;
  arrowPointer.style.backgroundColor = e.target.dataset.bgcolor;
  colorPalete.forEach((el) => el.classList.remove("color__palette--active"));
  e.target.classList.add("color__palette--active");
};
Local Storage Use
In the third step, we will use Local Storage to save the theme that the user has selected. This way, their theme selection will be retained even if the user refreshes the page or closes it. To do this, we have to store the current theme in Local Storage and load that theme whenever the user refreshes the page. Seems fairly easy? Let’s begin then.
First, we call the setItem method on the LocalStorage object.
localStorage.setItem();
This method enables us to store data in the browser and create a “key: value” pair, with the key being a name used to reference the stored value in Local Storage.
Next, we pass in “key: value” pair into our setItem method
localStorage.setItem("palette", color);
Keep in mind that the color argument would be the value stored in the palette we click.
Next we wrap our above snippet in a function.
const setLocalStorage = function (color) {
  localStorage.setItem("palette", color);
};
This way, whatever value is being called with the setLocalStorage function becomes color value.
Next, we call the setLocalStorage function with the element that was clicked.
setLocalStorage(e.target.dataset.bgcolor);
Note: To ensure that Local Storage is updated with the current theme, we call this function inside the themeChanger function.
To prove Local Storage is operational, head over to your developer tools, open the application tab, and then click on a palette.
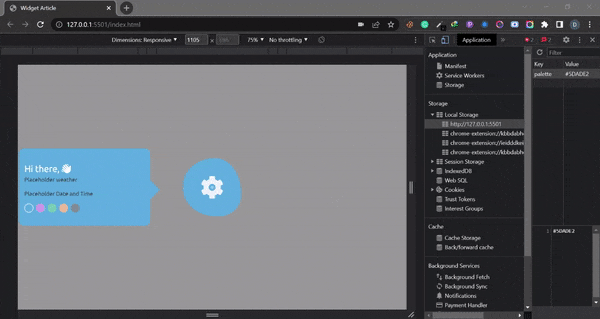
If you observe closely, each time we click on a palette, the local storage theme value is updated, proving we’ve successfully saved the current theme value.
To ensure that we don’t lose our theme when we reload or exit the webpage, we retrieve our theme from local storage and update our interface. To implement this, we start by listening for the load event.
window.addEventListener("load", function () {});
Next, we retrieve the value stored in our Local Storage using its key and store it in a variable.
const paletteColor = localStorage.getItem("palette");
After that, we change the theme of all our targetted elements to the value stored in Local Storage.
widgetSideBar.style.backgroundColor = paletteColor;
widgetBlob.style.backgroundColor = paletteColor;
arrowPointer.style.backgroundColor = paletteColor;
Next, we clear all the active classes on the palette elements
colorPalete.forEach((el) => el.classList.remove("color__palette--active"));
Finaly, we select the palette whose data attribute value matches that value stored in the Local Storage, and add the active class to it.
const btn = document.querySelector(
    `.color__palette[data-bgcolor="${paletteColor}"]`
  );
btn.classList.add("color__palette--active");
We have successfully completed all the steps on the right side of our flowchart. Congratulations on making it this far 🎈, but we still have more work to do.
Next up, we’d be working on adding live weather information using asynchronous JavaScript ( promises and the try… catch block. ).
Adding Weather functionality to the Widget using Asynchronous JavaScript
A code is asynchronous if it can execute multiple lines of code at the same time, rather than executing them one at a time in the order in which they appear.
In JavaScript, asynchronous code is typically written using callback functions, promises, or async/await. These techniques allow the JavaScript engine to execute multiple lines of code concurrently, rather than executing them sequentially. In this step, we’re going to use promises and async/await. techniques to fetch the user’s current position and supply the user with weather data corresponding with their location.
The steps to achieving this include:
Promisifying the Geolocation API.
Catching the error produced when the Geolocation API promise fails.
Creating an async function to contain all our logic.
Extracting the user’s coordinates.
Fetching the user’s city data with the user’s coordinates.
Throwing an error if the user’s city data cannot be obtained.
Fetching the user’s weather data with the user’s coordinates.
Throwing an error if the user’s city weather data cannot be obtained.
Destructuring the weather data object to get the weather value.
Storing the final weather data string in a variable.
Inserting the weather data in our webpage.
Quite a lot of steps, isn’t it? Well, don’t worry, we’ll go through each of them thoroughly.
Before promisifying the Geolocation API, we have to understand what it is. The Geolocation API is a Native JavaScript API that allows web apps to access the user's geographic location. The Geolocation API allows websites to request the user's location, and the user's browser will then prompt them to allow or deny the request. To promisify the geolocation API, we create a function that returns a new promise. Then using the newly returned promise, we pass in Geolocation API as a callback.
const getPosition = function () {
  return new Promise(function (resolve, reject) {
    navigator.geolocation.getCurrentPosition(resolve, reject);
  });
};
Keep in mind that calling this function right now returns a promise and not the data gotten from the Geolocation function.
Next, we catch any errors formed when the Geolocation promise fails (i.e, the user refuses to share their location data).
getPosition().catch((err) =>
  alert(`${err.message}. Please grant location access to see weather data`)
);
After that, we create our async function which includes a try…catch block to contain all our logic.
const whereAmI = async function () {
  try {
  } catch {}
};
To extract the user’s coordinates (latitude and longitude), we simply await the values from the getPosition function, then deconstruct the result into 2 variables.
const position = await getPosition();
const { latitude, longitude } = position.coords;
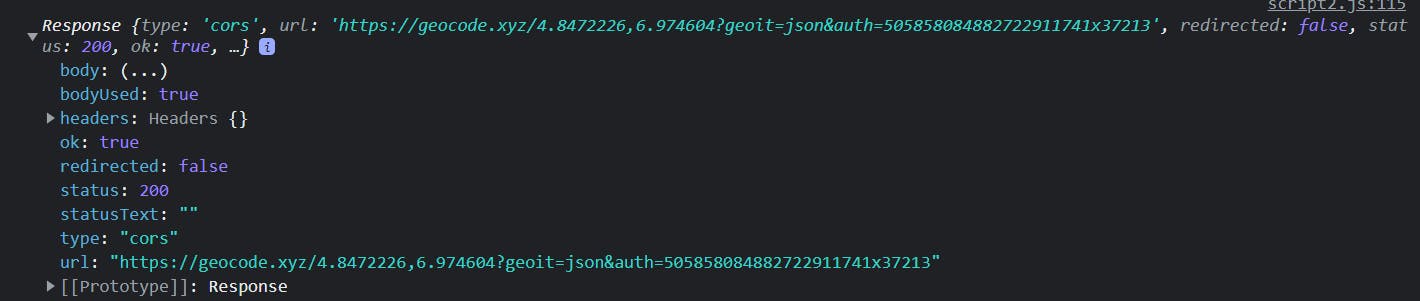
Next, we use a Reverse Geolocation API to convert our coordinates into a defined city. I’ll be using Geocode XYZ’s Reverse Geolocation API to perform this operation.
const responseGeo = await fetch(     `https://geocode.xyz/${latitude},${longitude}?geoit=json&auth=YOUR_API_KEY`
    );
Our result in the console becomes
If an error occurs during the fetch operation, we handle that by using an error constructor function to throw an error message.
if (!responseGeo.ok) throw new Error("Problem getting location data");
If no error occurs, we convert the result of our fetch function to an object using the .json() method.
const dataGeo = await responseGeo.json();
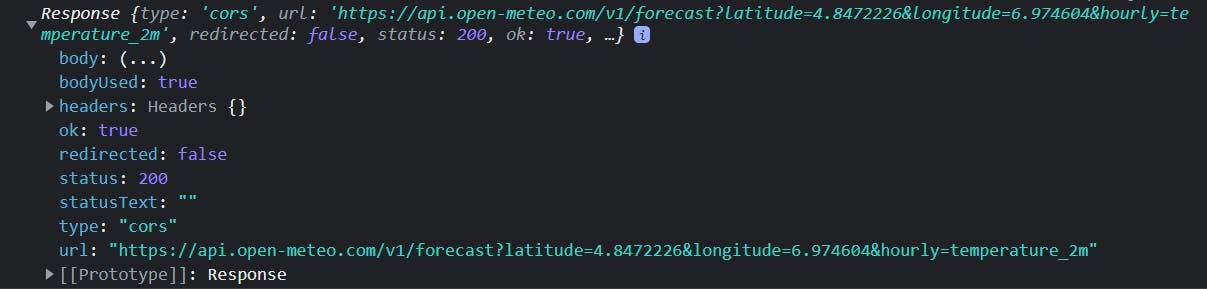
Next, we use a Weather API to fetch the user’s weather information based on their current position. We’ll be using Open Metro’s API to get our weather data.
const weatherResponse = await fetch(
      `https://api.open-meteo.com/v1/forecast?latitude=${latitude}&longitude=${longitude}&hourly=temperature_2m`
    );
Our result in the console becomes
We also account for errors during the fetch operation.
if (!weatherResponse.ok) throw new Error("Problem getting Weather data");
Then convert the value of the fetch function to an object if we do not encounter any errors.
const weatherData = await weatherResponse.json();
We then deconstruct our weatherData object to obtain the exact current weather value.
const [curWeather] = weatherData.hourly.temperature_2m;
After that, we create a string which contains the format for displaying our weather on our webpage.
const finalWeather = `The weather in ${dataGeo.region} right now is ${curWeather} ${weatherData.hourly_units.temperature_2m}`;
Logging our progress to the console so far gives:

The resulting data will vary based on your location, but the format would likely be similar.
Then, we insert the above string into our webpage
const weatherEl = document.querySelector(".weather");
 weatherEl.insertAdjacentText("beforeend", finalWeather);
And with this, we’ve successfully completed our widget, congratulations!🎉🎉
Only thing left to do is catch any errors that we may not have caught earlier using the catch block and log that to the console.
catch (err) {
    console.log(`${err} 💥💥💥`);
  }
Then calling our function in the global scope.
whereAmI();
Our final codebase looks something like this
const setLocalStorage = function (color) {
  localStorage.setItem("palette", color);
};

const widget = document.querySelector(".widget");
const widgetBlob = document.querySelector(".widget__blob");
const widgetSideBar = document.querySelector(".widget__sidebar");
const arrowPointer = document.querySelector(".arrow__pointer");
const weatherEl = document.querySelector(".weather");
const paletteContainer = document.querySelector(".color__palette--container");
const colorPalete = document.querySelectorAll(".color__palette");
const dateEl = document.querySelector(".date");

window.addEventListener("load", function () {
  const paletteColor = localStorage.getItem("palette");
  widgetSideBar.style.backgroundColor = paletteColor;
  widgetBlob.style.backgroundColor = paletteColor;
  arrowPointer.style.backgroundColor = paletteColor;

  const btn = document.querySelector(
    `.color__palette[data-bgcolor="${paletteColor}"]`
  );
  colorPalete.forEach((el) => el.classList.remove("color__palette--active"));
  btn.classList.add("color__palette--active");
});

const revealSideBar = function () {
  widgetSideBar.classList.toggle("hidden");
};

widgetBlob.addEventListener("click", function () {
  revealSideBar();
  getDnT();
});

colorPalete.forEach((el) => (el.style.backgroundColor = el.dataset.bgcolor));

const themeChanger = function (e) {
  widgetSideBar.style.backgroundColor = e.target.dataset.bgcolor;
  widgetBlob.style.backgroundColor = e.target.dataset.bgcolor;
  arrowPointer.style.backgroundColor = e.target.dataset.bgcolor;
  colorPalete.forEach((el) => el.classList.remove("color__palette--active"));
  e.target.classList.add("color__palette--active");
  setLocalStorage(e.target.dataset.bgcolor);
};

colorPalete.forEach((el) => {
  el.addEventListener("click", themeChanger);
});

document.addEventListener("keydown", function (e) {
  if (e.key === "Escape" && !widgetSideBar.classList.contains("hidden")) {
    widgetSideBar.classList.toggle("hidden");
  }
});

const getDnT = function () {
  const now = new Date();
  const dateOptions = {
    hour: "numeric",
    minute: "numeric",
    day: "numeric",
    month: "long",
    year: "numeric",
    weekday: "long",
  };

  const locale = navigator.language;

  const curDate = new Intl.DateTimeFormat(locale, dateOptions).format(now);

  dateEl.textContent = `Your current date and time is ${curDate}`;
};

const getPosition = function () {
  return new Promise(function (resolve, reject) {
    navigator.geolocation.getCurrentPosition(resolve, reject);
  });
};

getPosition().catch((err) =>
  alert(`${err.message}. Please grant location access`)
);

const whereAmI = async function () {
  try {
    const position = await getPosition();
    const { latitude, longitude } = position.coords;
    const responseGeo = await fetch(
      `https://geocode.xyz/${latitude},${longitude}?geoit=json&auth=YOUR_API_KEY`
    );

    if (!responseGeo.ok) throw new Error("Problem getting location data");
    const dataGeo = await responseGeo.json();

    const weatherResponse = await fetch(
      `https://api.open-meteo.com/v1/forecast?latitude=${latitude}&longitude=${longitude}&hourly=temperature_2m`
    );
    if (!weatherResponse.ok) throw new Error("Problem getting Weather data");

    const weatherData = await weatherResponse.json();
    const [curWeather] = weatherData.hourly.temperature_2m;

    const finalWeather = `The weather in ${dataGeo.region} right now is ${curWeather} ${weatherData.hourly_units.temperature_2m}`;

    weatherEl.insertAdjacentText("beforeend", finalWeather);
  } catch (err) {
    console.log(`${err} 💥💥💥`);
  }
};
whereAmI();

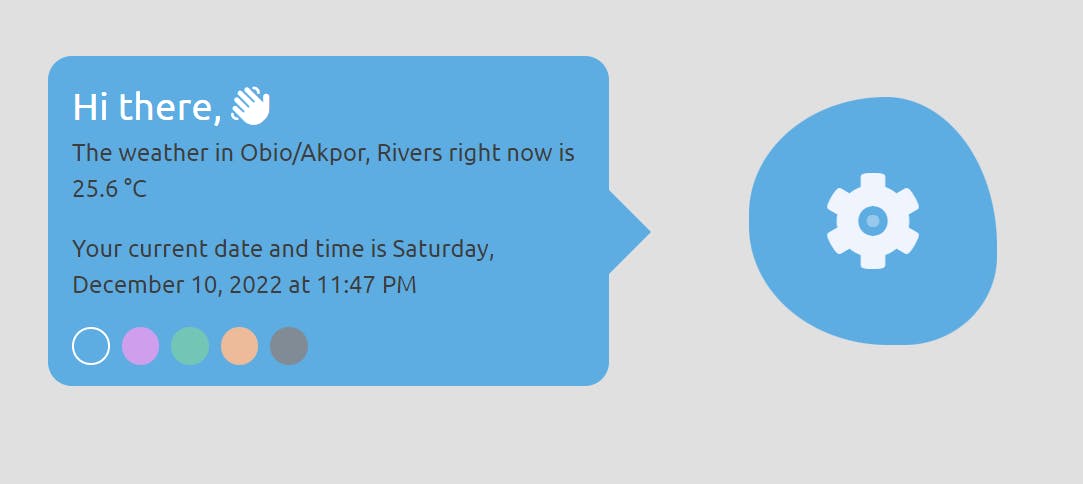
As you can see, our utility widget is fully operational, good going! It displays accurate time, date and weather information all at the click of a button, pretty cool, don’t you think?
Limitation
Despite our best efforts to build a cool application, it does have a limitation. Both APIs used during implementation were free APIs, meaning that they can only handle a limited number of API calls per second. This hinders our widget from being a full-scale application that can be used by a large number of people simultaneously.
Project Link
Source Code: GitHub
Conclusion
We successfully built a utility widget using JavaScript that can provide us with the current weather, date, and time. This widget utilizes the fetch() function to retrieve data from a Weather API and the Date object to access the current date and time. By implementing this widget, we have demonstrated the power of JavaScript in creating dynamic and useful web applications. With a few lines of code, we are able to access real-time data and display it in a user-friendly manner, making it easy for users to stay informed and up-to-date. Overall, this widget serves as a useful tool for anyone looking to quickly check the current weather, date and time.